
How to Split your View
For me one pane is never enough. That's why I love the Split Window tool within eCognition. You will find this tool in the Window menu and you have three different possibilities for splitting your view pane.
- Split Horizontally
- Split Vertically and
- Split, which will split the pane horizontally & vertically creating 4 individual view panes
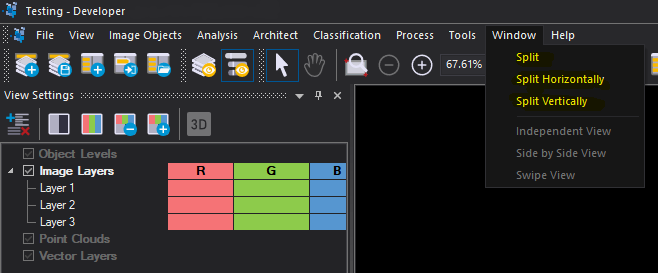
Moreover, there are three more very useful settings which define how the panes are connected:
- Choose Independent View to have them disconnected - each pane will view independently from one another allowing you to examine several parts of your project simultaneously
- Choose Side by Side View to synchronize the view panes to always show the same extent
- The Swipe View allows the user to swipe one view pane over the other - great for comparisons
Have fun exploring this cool functionality!
Was this article helpful?
3 comments
Your Answer
Articles in this section
- Configure image equalization
- Colorize feature View and Adjusting Thresholds
- Apply View Settings to All Windows
- Adding Text to an Image
- Image Object Skeletons
- Layer Histogram
- Deleting a Level in your rule set
- How to change the transparency of your Classification
- Change order of Classes in the Class Hierarchy window
- Change image object outline color (if selected)
I am working through the "From the Ground Up" tutorial, and when I split my view as he does in the video (and following these instructions) both windows display the same thing. How do you change what is viewed in each window?
The following algorithm can automate the view settings: "set custom view settings". There are a whole variety of settings/configurations you set here. You can also choose which window to apply the settings to (first, second, third, fourth, all).
Hope this is helpful.
You can also manually set the view in each window by clicking in a specific window and adjusting the view settings.